Makeup Tips For Photos
Cream makeup, beloved by makeup artists and photography enthusiasts alike, offers unparalleled blendability and coverage, setting the stage for a flawless complexion in photographs. The beauty of cream-based products lies in their ability to glide over the skin, smoothing out imperfections without settling into fine lines or creating a powdery finish. When applying cream makeup, opt for tools like a damp beauty sponge or a stippling brush to gently press the product into the skin, achieving a coverage that mimics the natural texture and luminosity of healthy, radiant skin. This technique not only prevents the makeup from looking heavy but also secures a more durable, photograph-ready finish. By favoring cream products, from liquid foundation to blush and contour, you’re able to build layers of sheer color that enhance rather than obscure your natural beauty, guaranteeing a polished and photogenic look every time.
When it comes to your makeup for photos think WARMTH! It’s easy for your skin to be blown out in photos and these tips help bring it back to life 👇🏻
1: Bronzer first – I love the warm glow this adds to your skin. Feel free to add it at the end if you feel you need more
Introducing bronzer at the beginning of your makeup routine can work wonders in imparting a natural, sun-kissed radiance to your skin, making it an essential step for achieving a photo-ready complexion. Opt for a cream bronzer to ensure seamless integration with your base, applying it on areas where the sun naturally hits your face—like the forehead, cheekbones, and bridge of the nose. This technique not only adds warmth but also subtly sculpts your features before you even reach for the contour. The beauty of cream bronzer lies in its blendability, allowing you to layer and intensify the warmth as needed without compromising the skin’s natural texture. If, after completing your makeup, you find your skin could benefit from a touch more glow, lightly reapply the bronzer to enhance the sunlit effect. This approach ensures your skin looks luminous and vibrant, with a warmth that appears as though it emanates from within, making your photos appear more dynamic and alive. Remember, the goal is to enhance your natural beauty with a hint of warmth, creating a versatile base that adapts to both minimalist and more dramatic makeup looks.

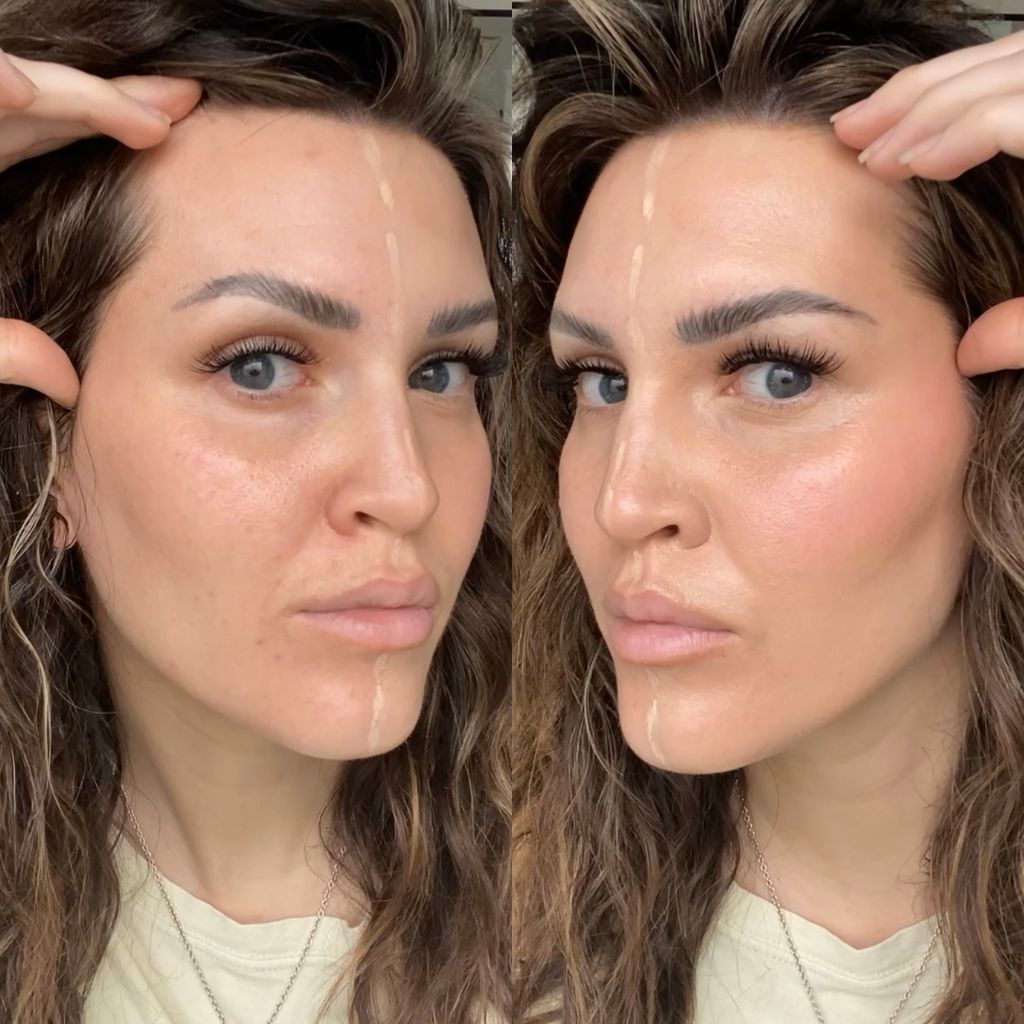
2: Contour – I promise you this is the game changer in photos (especially on the nose!)
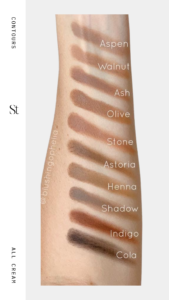
Contouring is a skillful technique that, can magnificently elevate your facial features, making them standout in every photograph. Embrace a cream contour product, deliberately chosen a few shades darker than your natural complexion, to subtly sculpt beneath your cheekbones, trace along the jawline, and accentuate the temples. The cream’s formula is key to its blendability, ensuring the contour melds seamlessly with your base makeup for a result that looks like natural shadow rather than makeup. It’s essential to approach contouring with a light hand, focusing on enhancing your features rather than altering your face’s natural contours. By applying the product in targeted areas and blending thoroughly, you create a refined, dimensional look that captures beautifully on camera. This method not only brings out your features but does so in a way that remains true to your natural beauty, adding depth and definition where light naturally plays on the face.
3: Foundation – I am a BIG FAN of cream foundation because it photographs so beautifully and really mimics the skin so you actually look like you!
Cream foundation lies in its unique ability to provide full, yet undetectable coverage, making it an indispensable choice for those aiming for a photo-ready look. Its creamy texture offers a level of adaptability that powder or liquid foundations can’t match, allowing for both sheer and full coverage applications depending on your needs. The magic of cream foundation is its capacity to merge with the skin, creating a finish that’s both impeccable and incredibly natural-looking. This characteristic is particularly beneficial in photography, where harsh lighting can amplify imperfections or makeup that sits atop the skin rather than blending with it. When applying cream foundation, it’s crucial to start with a small amount, building up coverage gradually to avoid a cakey appearance. Opting for a cream foundation ensures that your skin looks its best, with a texture and tone that’s even, luminous, and authentically you, under any lighting conditions.
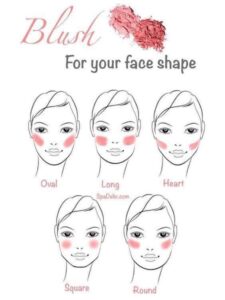
4: Blush – it may seem scary but use a warmer/more vibrant shade or add about 30% more than you usually do!
The key to achieving that perfect, photo-ready flush isn’t to shy away from color, but rather to embrace bolder, warmer shades of blush or to increase the intensity of your go-to hue by about 30%. This might feel a bit daring if you’re accustomed to a more subtle makeup look, but photographs have a way of softening the appearance of makeup, making your skin look more alive and your features more defined with a stronger blush. Opt for a cream blush to maintain consistency with the rest of your cream-based products, as this will help in blending seamlessly for a natural, radiant glow.
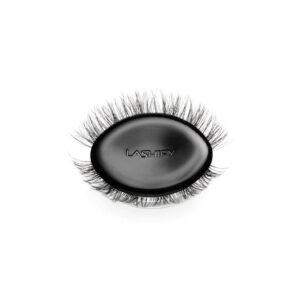
8: Falsies – Enhancing your eyelashes can dramatically elevate your makeup look, particularly in photos where the eyes are a central focal point. Traditional false lashes can sometimes be a giveaway with their noticeable strip lines, but at-home lash extensions like those offered by Lashify provide a seamless solution. These innovative extensions blend effortlessly with your natural lashes, offering a customizable length and volume that can accentuate your eyes without the harsh lines associated with conventional falsies.
My lash map from the outside to inside 15, 14, 13, 11, 10
These last me 7-9 days! Super easy to apply.
5: Concealer – make sure you don’t go too light or use too much under the eyes – it can enhance any fine lines there
Choosing the right concealer for photography is a delicate balance. Going too light with your concealer, especially under the eyes, can result in an unnatural, stark contrast that accentuates fine lines and wrinkles, rather than concealing them. Similarly, heavy application can settle into and highlight these imperfections, drawing unwanted attention in photos. To counteract this, opt for a concealer only one or two shades lighter than your natural skin tone. This ensures coverage without creating a stark contrast. Additionally, select a cream concealer for its creamy texture that complements the seamless, natural finish achieved with other cream-based products in your makeup routine.
6: Use a lip liner or contour your lips – this creates the illusion of more fullness and defines your lips
Creating the illusion of fuller lips is a makeup trick that translates beautifully in photographs, and the strategic use of a lip liner is key to achieving this effect. Start by selecting a lip liner that closely matches your chosen lipstick shade, or go for a universal nude that complements your skin tone. The trick is to slightly overline your natural lip line, focusing on the cupid’s bow and the center of your bottom lip to enhance fullness without looking unnatural. Keep the overlining subtle to maintain believability, and ensure the edges are soft by lightly blending the liner inwards with a lip brush or your fingertip. This base not only defines the shape of your lips but also prevents your lipstick from feathering, keeping your pout perfect throughout the day. For an added touch of dimension, you can contour your lips by applying a slightly darker shade of liner at the corners and blending towards the center. This contouring technique creates a gradient effect that enhances the voluminous appearance of your lips, making them stand out in any photo. Remember, the goal is to enhance and define your natural lip shape, giving you a confident, photo-ready smile.
7: Warm lip shade – go for a warm undertone and try to go 2-3 shades darker than your natural lip color
Selecting the right lip shade can transform your makeup look from ordinary to extraordinary, especially in photos. Warm undertones in your lipstick can add a radiant, vibrant touch that’s universally flattering, bringing life to your complexion and enhancing your smile. When aiming for a photo-ready finish, consider choosing a lipstick that’s 2-3 shades darker than your natural lip color. This slight deepening of shade ensures your lips stand out, adding depth and dimension without overpowering your overall makeup look.
9: Warm matte eyeshadows – don’t go too dark on your eyes – you want to keep them subtle and open!
Choosing the right eyeshadow palette can significantly influence your photo outcomes, especially when aiming for a look that accentuates your eyes without overshadowing your natural beauty. Warm matte eyeshadows are your best ally in achieving a soft, inviting gaze that translates wonderfully on camera. These shades, ranging from soft peaches to gentle browns, blend seamlessly onto the eyelid, creating depth and definition in a subtle manner. The key is to build the color gradually, focusing on the crease and outer corners of the eyes for a natural-looking contour that enhances your eye shape. Avoid going too dark with your eyeshadow choices, as heavy application can make the eyes appear smaller and less vibrant in photographs. Instead, aim for a balanced look that opens up the eyes, making them appear brighter and more awake. This approach ensures your eyes remain a captivating focal point, reflecting light beautifully and complementing the overall warmth and radiance of your makeup look.
10: Set with a light powder in your t zone where you tend to catch the most shine